Covering drilling methods, chemical application, safety, maintenance, and cost considerations, this guide aims to equip homeowners, pest control professionals, and civil engineers with the knowledge needed to implement or oversee effective termite treatments in concrete structures.
Termite Treatment Holes in Concrete are a key strategy for protecting buildings and ensuring long-term durability.
Table of Contents
ToggleTermite Treatment Holes in Concrete
Importance of Termite Control
Termites are among the most destructive pests in the world, causing significant structural damage each year. Often called “silent destroyers,” these insects can compromise building integrity without immediate visible signs.
While wood is their main food source, termites are also able to infest concrete structures by exploiting cracks, joints, and utility entry points to access hidden cellulose sources within.
For homeowners, builders, and property managers, termite prevention and control are essential for maintaining long-term structural stability and safety.

Challenges with Concrete Structures
Concrete is not immune to termite infestation. Although termites do not eat concrete, they can navigate through small cracks, expansion joints, and gaps left around plumbing or electrical conduits. Once inside, they establish colonies and begin feeding on wooden frames, skirting boards, furniture, and other cellulose-based materials.
Detecting and treating termites in concrete structures is especially challenging because:
- Infestations often go unnoticed until significant damage has occurred.
- The termites’ access points are hidden or inaccessible.
- Conventional surface treatments are ineffective when the infestation is beneath concrete slabs.
Understanding Termite Infestation in Concrete
How Termites Penetrate Concrete
Although termites cannot chew through solid concrete, they are remarkably skilled at finding entry points. Their small size and persistent behavior allow them to:
- Exploit cracks as narrow as 1/32 of an inch in foundations, floors, and walls
- Use expansion joints and settlement gaps in concrete slabs to access the soil beneath the structure
- Travel through voids left around utility conduits such as plumbing, electrical, and HVAC lines
- Build mud tubes along surfaces to maintain moisture and protection while moving
Once inside, termites create underground galleries that lead to wooden components, making detection and treatment difficult without specialized knowledge or equipment.
Signs of Infestation
Identifying termite presence in or around concrete areas requires vigilance and thorough inspection. Common signs include:
- Hollow-sounding wood or visibly damaged wooden structures near concrete flooring or walls
- Mud tubes emerging from expansion joints, foundation walls, or utility entry points
- Discarded wings from swarming termites near doorways or windows
- Bubbling paint or soft spots in flooring that suggest underlying damage
- Fine cracks or dust near baseboards and tiles, sometimes mistaken for settling
Visible signs often appear after the infestation has become established, making proactive treatment and regular inspections essential.
Types of Termites That Affect Concrete Areas
-
Subterranean Termites (e.g., Coptotermes spp.)
- Live in soil and build mud tubes to access food
- Most destructive and commonly found under concrete slabs
- Thrive in high-moisture environments
-
Formosan Termites
- Highly aggressive subterranean species
- Capable of creating secondary nests above ground if moisture is present
- Difficult to eliminate once established
-
Drywood Termites
- Less common in concrete areas but can infest wooden components once inside
- Do not require contact with soil
- Often spread through infested wooden furniture or materials
Principles of Termite Treatment
Pre-construction vs. Post-construction Treatment
Pre-construction Treatment
- Treats soil before concrete is poured to create a chemical barrier against termites.
- Anti-termite chemicals are applied to foundation pits, trenches, and plinth fillings.
- Soil under flooring and around the perimeter is treated for comprehensive protection.
- This method is cost-effective and provides long-term defense when implemented before construction begins.
- Higher efficacy due to direct access to soil.
- Prevents infestation from the outset.
- Complies with relevant construction standards.
Post-construction Treatment
- Applied when a building is already constructed and termite activity is detected.
- Drilling holes in concrete is required to inject termiticides into the soil below the slab.
- Holes are drilled along walls, floors, and expansion joints, then sealed after treatment.
- Limited access to certain infestation zones.
- Requires skilled labor and specialized equipment.
- Potential disruption to flooring or interiors during the process.
Chemical Barriers and Soil Treatment
Chemical treatment is the most common and effective method for termite control, creating a toxic barrier in the soil to repel or eliminate termites attempting to cross it.
Types of Termiticides:| Type | Function | Longevity |
|---|---|---|
| Repellent (e.g., Chlorpyrifos) | Drives termites away from treated areas | 3–5 years |
| Non-repellent (e.g., Fipronil, Imidacloprid) | Termites contact and transfer the chemical unknowingly | 5–10 years |
| Baiting Systems | Slower acting, uses poison-laced food | Varies, requires ongoing monitoring |
- Sub-slab Injection: Injecting termiticide through drilled holes to reach soil beneath concrete.
- Trench and Treat: Treating soil around the perimeter if accessible.
- Surface Treatment: Applying chemicals around infested wooden structures as a secondary measure.
Integration with Building Design
- Incorporating termite shields or metal barriers during construction to deter entry.
- Ensuring proper ventilation and moisture control to reduce termite attraction.
- Avoiding direct contact between wooden elements and soil or concrete for added protection.
Why Drill Holes in Concrete for Termite Treatment?
Termite treatment holes in concrete are small holes that are drilled into concrete surfaces, such as floors, foundations, or pathways, as part of a process to control and prevent termite infestations. This method is commonly used when termites are suspected to be entering a building from the soil beneath or around concrete areas.
What Is This Method About?
- Making small holes in the floor, near the walls or other critical areas
- Injecting liquid chemicals (termiticides) through those holes
- Letting the chemical reach the soil or termite colonies below
- Sealing the holes once the treatment is done
This method helps create a chemical barrier between the building and the soil, stopping termites from coming up or moving around.
Why Do We Need to Drill Holes?
Concrete acts as a strong shield, but termites can still find their way through tiny gaps. Spraying the surface is not enough for termites hiding underneath, as they live below and avoid light and open air.
- Reach deep: The chemical needs to go under the slab where termites travel
- Target their paths: Especially near walls, pillars, and bathroom areas where they enter
- Prevent re-entry: The chemical barrier stops new termites from entering after treatment

Where Are the Holes Drilled?
- Along the inner walls, especially where walls meet the floor
- At fixed intervals, usually every 1 to 1.5 feet (30–45 cm)
- In kitchens and bathrooms, near plumbing lines
- Around wooden structures like door frames, cupboards, or window frames fixed to the concrete
- For outdoor treatment, along the building perimeter just outside the walls to create an external barrier
How Deep and Wide Are the Holes?
- 12 to 18 inches deep (30–45 cm), or deep enough to reach soil below the concrete slab
- 10 to 12 mm in diameter, about the size of a pen or small finger
- Drilled using electric hammer drills with special concrete bits
The depth can vary based on the thickness of the slab or floor.
What Happens After the Holes Are Drilled?
- Chemicals are injected using a high-pressure sprayer or pump
- The chemical spreads in the soil underneath, killing termites and blocking their entry
- The holes are sealed back with white cement or concrete so the floor looks normal again
Is This Method Safe and Effective?
- The method is very effective for treating hidden or deep infestations
- It lasts for years, depending on the chemical used
- It is safe for homes if proper safety guidelines are followed
This method should only be done by trained professionals, as incorrect drilling or chemical use can damage flooring or leave gaps in protection.
When Should This Method Be Used?
- When termites are found in a building that is already built (post-construction)
- When signs of termite damage are visible inside the house
- When there is no access to soil around the structure, such as in row houses or commercial buildings
- When planning a full termite treatment to protect the entire building
Termite Treatment Holes in Concrete allow chemicals to reach the places termites hide most-under your floor. It is like sending medicine directly to the infection inside your body instead of just treating the surface. Termite Treatment Holes in Concrete are a targeted and effective approach for long-term protection.
Step-by-Step Drilling and Treatment Process
Drilling Termite Treatment Holes in Concrete is a safe, proven, and highly effective method for addressing termite problems under concrete floors. Below is a step-by-step procedure for drilling holes for termite treatment process.

Tools and Safety Gear Needed
- Tools:
- Hammer drill machine for drilling into concrete
- Concrete drill bits, typically 10–12 mm thick
- Injection pump for injecting termiticide
- Measuring tape or chalk to mark hole locations
- White cement or putty for sealing holes
- Safety Gear:
- Safety goggles to protect eyes from dust
- Gloves to prevent skin contact with chemicals
- Face mask or respirator to avoid inhaling fumes
- Ear protection due to drilling noise
Step 1: Inspect the Area
Before starting any termite treatment, a thorough inspection of the area is essential. This step helps you understand the extent of the problem and plan the most effective solution. Here’s how to approach this inspection:
- Check for visible signs of termites: Look for mud tubes along walls or foundations, damaged or hollow-sounding wood, discarded wings, and small holes in wooden surfaces. These are common indicators that termites are present in the area.
- Identify nearby wooden structures such as doors and windows: Pay special attention to wooden doors, window frames, skirting boards, and any other wooden fixtures. Termites are attracted to these areas because they provide easy access to food and shelter.
- Determine if the floor is solid concrete or tile: Knowing the type of flooring helps you decide how to apply the treatment. Solid concrete or tiled floors may require drilling to reach the soil beneath, while wooden or raised floors might allow for different treatment methods.
- Locate plumbing lines or electric cables under the floor: It’s important to identify where pipes and cables run beneath the surface to avoid damaging them during drilling. This step ensures safety and prevents costly repairs.
- Plan the drilling pattern and number of holes needed: Based on your inspection, decide where and how many holes need to be drilled. The pattern should cover all affected areas, especially near walls, wooden structures, and potential entry points for termites. Proper planning ensures the treatment reaches all hidden termite colonies.

Step 2: Mark the Drill Points
Before starting the termite treatment, it is important to carefully mark where you will drill holes. These drill points are essential for making sure the treatment reaches all the areas where termites might be hiding or entering your home.
- Mark holes along the edges of walls, especially where they meet the floor: Termites often travel along the junction between walls and floors, so these areas are key spots for drilling. By marking these edges, you make sure the treatment can block termite entry points.
- Mark in bathrooms, kitchens, and near plumbing lines: Wet areas like bathrooms and kitchens, as well as places near plumbing, are more likely to attract termites because of the moisture. Marking holes in these areas ensures the treatment covers spots where termites are most likely to invade.
- Mark around wooden door frames or cupboards attached to concrete: Wooden structures connected to concrete, such as door frames or built-in cupboards, are vulnerable to termite attacks. Marking around these features helps protect them from damage.
- Space holes about 1 to 1.5 feet (30–45 cm) apart: When marking holes, keep them evenly spaced about 1 to 1.5 feet apart. This spacing helps the treatment spread effectively through the soil or wall and reach all potential termite pathways.
- For large rooms, this may require dozens of holes along all sides: In bigger rooms, you will need to mark many holes along each wall to ensure complete coverage. This might seem like a lot of work, but it is necessary for thorough protection.
By carefully marking the drill points in these critical locations, you help ensure that the termite treatment will be effective and long-lasting.
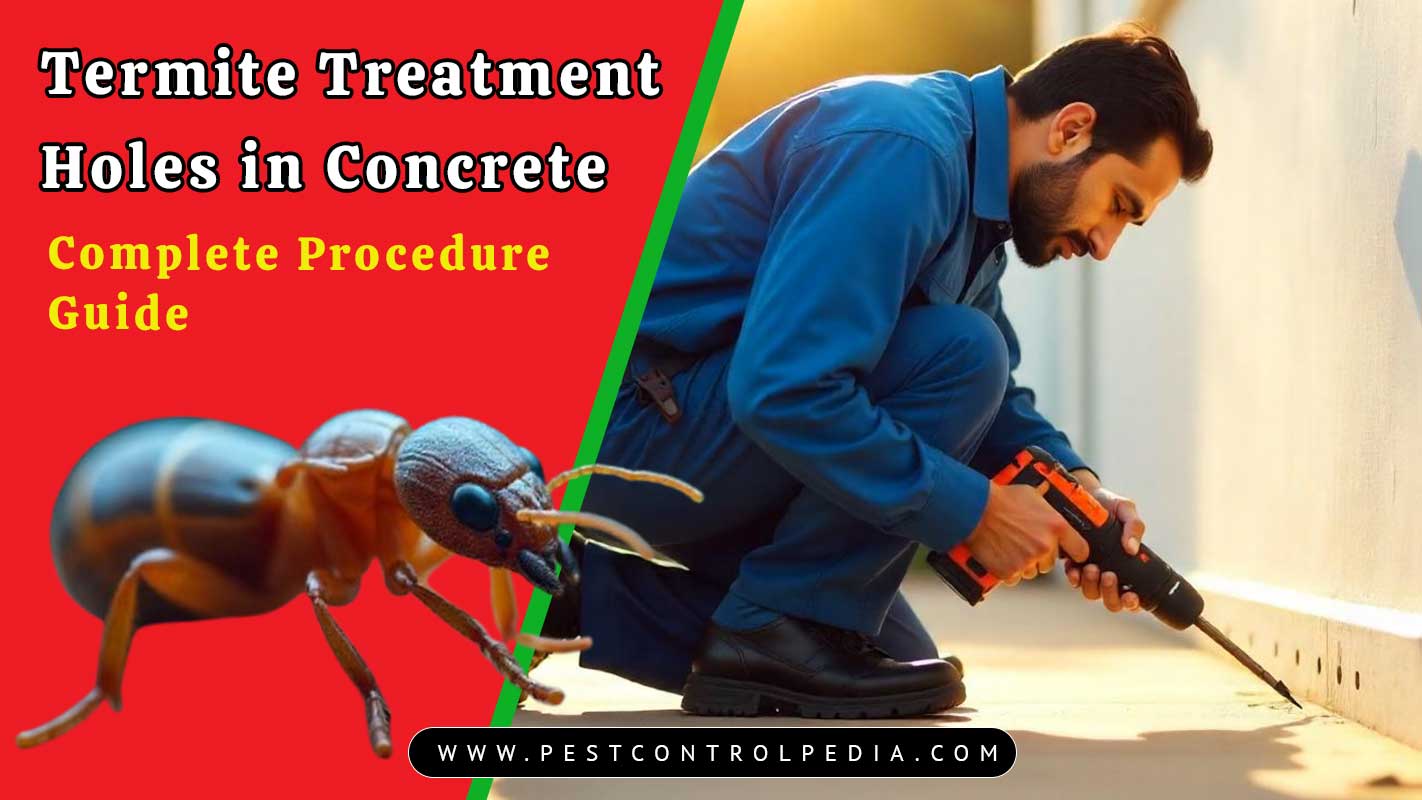
Step 3: Drill the Holes
Drilling holes is a crucial part of termite treatment because it allows the termiticide to reach the areas where termites are hiding. Here’s how you should carry out this step:
- Use a hammer drill to create holes 10–12 mm wide: A hammer drill is the best tool for this job, as it can easily make holes through concrete, wood, or tile. The holes should be about 10 to 12 millimeters in diameter, which is wide enough to allow the chemical to be injected effectively.
- Drill at a 45-degree angle: When making the holes, aim the drill at a 45-degree angle. This angle helps ensure that the termiticide flows down into the soil or the infested area, rather than leaking back out of the hole. This way, the chemical reaches the places where termites are likely to be hiding.
- Drill deep enough to reach the soil below (12 to 18 inches / 30–45 cm): The holes should be deep enough to reach the soil beneath the floor or foundation. Usually, this means drilling to a depth of about 12 to 18 inches (or 30 to 45 centimeters). Reaching the soil is important because this is where subterranean termites travel and build their colonies.
- If drilling through tile, aim for grout lines: When you need to drill through tiled surfaces, try to drill along the grout lines instead of the tiles themselves. This helps to minimize visible damage and keeps the tiles from cracking, making repairs easier and less noticeable after the treatment is complete.
By following these steps, you make sure that the termiticide is delivered directly to the areas where termites are most active, increasing the effectiveness of your termite treatment and helping to protect your property from further damage.

Step 4: Inject the Chemical
Injecting termiticide is a crucial step in termite treatment, ensuring that termites are eliminated and prevented from returning. Here’s how this process works:
- Using a High-Pressure Pump: A high-pressure pump is used to inject the termiticide into each drilled hole. This equipment ensures that the chemical is delivered deep into the soil, reaching areas where termites may be hiding.
- Chemical Penetration and Spread: Once injected, the termiticide moves through the soil beneath the concrete slab. The chemical spreads outward from each hole, creating a protective barrier that termites cannot cross without being affected.
- Types of Termiticides Used: Common chemicals for this treatment include Fipronil, Imidacloprid, and Chlorpyrifos. These substances are chosen for their effectiveness and long-lasting protection, ensuring that the barrier remains active for years.
- Measured Application: Each hole is filled with a specific amount of termiticide, calculated based on the depth of the hole and the distance between holes. This careful measurement ensures even coverage and maximum effectiveness, leaving no gaps in the protective barrier.
By following these steps, the injected chemical forms a continuous shield in the soil, stopping termites from entering the building and protecting the structure for an extended period.
Step 5: Seal the Holes
After injecting the termite treatment solution into the drilled holes, it's important to properly seal them to finish the process and maintain the appearance of your floors or walls. Here’s how to do it step by step:
-
Clean out each hole after injection:
Once the termiticide has been applied, make sure to remove any leftover debris or dust from inside and around the holes. This helps the sealing material stick better and ensures a smooth finish. -
Seal holes with white cement, concrete, or tile grout:
Use a suitable material like white cement, concrete mix, or tile grout to fill the holes. These materials are chosen because they blend in well with most flooring and wall surfaces, and they provide a strong, lasting seal. -
Allow to dry; the floor will look almost undisturbed:
After sealing, let the material dry completely. Once dried, the treated area should look nearly the same as before, with the holes barely noticeable. -
Light cleaning or polishing may be done for a neat finish:
For a tidy appearance, you can lightly clean or polish the area once the sealant has dried. This helps blend the repair with the surrounding surface, making the treatment spots virtually invisible.

Step 6: Monitor and Follow-Up
After applying termite treatment, it’s important to follow a careful monitoring and follow-up process to ensure the treatment works effectively and to prevent future infestations. Here’s how you should proceed:
- Leave the Area Undisturbed: Once the chemical treatment has been applied, avoid disturbing the treated area for several hours. This allows the chemical to settle and form a protective barrier, increasing its effectiveness against termites.
- Conduct a Follow-Up Inspection: About 15 to 30 days after the initial treatment, inspect the area again. Look for any signs of new termite activity, such as mud tubes, damaged wood, or live termites. This follow-up helps confirm whether the treatment has worked or if termites are still present.
- Apply a Booster Dose if Needed: If you notice any termite activity during the follow-up inspection, apply an additional dose of the treatment to the affected spots. This booster helps reinforce the chemical barrier and targets any termites that may have survived the initial application.
Key Tips for Success
- Avoid mopping or washing the treated area for 24 hours
- Ensure good ventilation for proper drying
- Inform residents not to touch or disturb drilled spots until fully sealed
Simple Summary
| Step | What Happens |
|---|---|
| 1 | Area is inspected and marked |
| 2 | Holes are drilled along walls and floor |
| 3 | Chemicals are injected into soil below |
| 4 | Holes are sealed back neatly |
| 5 | Follow-up is done to ensure success |
This process protects your property from long-term damage without the need to remove or break up the flooring. For lasting results, always ensure the procedure is performed by trained professionals who follow all safety and application guidelines. Termite Treatment Holes in Concrete remains one of the best solutions for subterranean termite control in buildings.
Termiticide Chemical Mixing Proportion for Drill Hole Termite Treatment
General Mixing Proportion
- For Bayer Premise (Imidacloprid-based termiticide), the recommended mixing ratio is:
- 500 mL of Premise SC Termiticide per 100 liters of water.
- The target concentration for most termiticide solutions is typically 0.05% to 0.1% active ingredient in the final spray solution, depending on the product and severity of infestation.

Application Volume and Drill Hole Spacing
- When treating through drilled holes in concrete (such as along the perimeter of a building), the standard practice is to achieve a continuous chemical barrier in the soil beneath.
- Drill holes should be spaced 150–300 mm (6–12 inches) apart.
- The volume of mixed termiticide solution to inject per hole depends on soil type and spacing:
| Hole Spacing (mm) | Volume per Hole (L) | Soil Type |
|---|---|---|
| 150 | 1.5 | Heavy clay |
| 200 | 2.0 | Clay loams |
| 250 | 2.5 | Loams |
| 300 | 3.0 | Sands |
- The total application rate should be 100 liters of prepared spray per cubic meter of soil treated.
Mixing Procedure
- Fill the spray tank 1/4 to 1/3 full with water.
- Add the measured termiticide concentrate (e.g., 500 mL Premise SC per 100 L water).
- Start agitation and fill the tank with the remaining water.
- Ensure thorough mixing for even distribution during application.
Summary Table: Typical Mixing and Application Rates
| Product (Example) | Mixing Ratio | Target Concentration | Application Volume (per hole) | Hole Spacing |
|---|---|---|---|---|
| Premise SC | 500 mL / 100 L water | 0.05% | 1.5–3.0 L | 150–300 mm |
| Termidor SC | 600 mL / 100 L water | 0.06% | 1.5–2.0 L | 150–200 mm |
Important Notes
- Always refer to the specific product label for the exact mixing and application instructions, as formulations and concentrations may vary by manufacturer.
- After injection, drill holes should be properly resealed to prevent exposure.
- The goal is to create a continuous treated soil barrier between the structure and termite colonies.
Best Practices and Precautions
The best results for termite control are achieved when the correct methods, approved chemicals, and essential safety precautions are followed.
What to Do and Avoid When Treating Termites Under Concrete
Termite treatment through concrete is effective, but it must be performed properly and safely. Rushed work, improper application, or the use of incorrect chemicals can lead to termite reinfestation or even pose risks to people and pets. The following sections outline the best practices and essential precautions to observe before, during, and after drilling and treating concrete for termites.
Best Practices During Treatment
-
Hire Trained Professionals
- Always engage a licensed pest control company.
- Professionals understand the correct drilling depth, chemical dosage, and how to avoid floor damage.
- They adhere to safety protocols to protect your home and health.
-
Use the Right Chemicals
- Only approved termiticides such as Fipronil, Imidacloprid, or Chlorpyrifos should be used.
- Non-repellent chemicals are preferred so termites do not detect and avoid the treated area.
- Request chemical safety data sheets (MSDS) for verification.
-
Drill at the Right Spots
- Drill holes near walls, in bathrooms, kitchens, and close to wooden structures.
- Avoid random drilling to prevent wastage and ensure effective termite control.
-
Follow Correct Spacing and Depth
- Maintain a spacing of 30–45 cm (1 to 1.5 feet) between holes.
- Drill to a depth of 12–18 inches to reach the soil beneath the concrete.
- This creates a continuous chemical barrier against termites.
-
Seal Holes Neatly
- After treatment, fill each hole with cement or grout.
- A clean finish ensures safety and restores the floor’s appearance.
Safety Precautions to Protect People, Pets, and Property
-
Keep the Area Ventilated
- Ensure windows and doors remain open during and after treatment to disperse fumes.
-
Remove Food and Utensils
- Before treating kitchens, remove or cover cooking pots, utensils, and food items.
- Store them in another room for the duration of the treatment.
-
Keep Pets and Children Away
- Keep pets and children out of treated areas for at least 6–12 hours after application.
- This prevents accidental contact or inhalation of chemicals.
-
Avoid Mopping or Washing for 24 Hours
- Do not mop or wet the treated area immediately after application.
- Allow chemicals to dry and soak into the soil for maximum effectiveness.
Structural and Environmental Precautions
-
Avoid Damaging Plumbing or Cables
- Check for pipes, wires, or gas lines before drilling.
- Use building plans or a pipe scanner when possible to prevent accidents.
-
Protect Plants and Gardens
- When drilling outdoors, cover nearby plants to prevent chemical exposure.
- Termiticides can harm plants if they reach roots or soil.
Regular Monitoring After Treatment
- Inspect wooden furniture for new signs of termite activity.
- Look for fresh mud tubes along walls or floors.
- Schedule professional inspections every 6–12 months for ongoing protection.
Quick Checklist: Do’s and Don’ts
| Do’s | Don’ts |
|---|---|
| Hire trained professionals | Don’t try DIY unless you’re experienced |
| Use safe, approved termiticides | Don’t use expired or unknown chemicals |
| Ventilate the treated area | Don’t close rooms immediately after spraying |
| Seal holes neatly after treatment | Don’t leave holes open or messy |
| Monitor regularly | Don’t assume one treatment lasts forever |
Cutting corners in termite treatment can result in greater damage and higher costs over time. Termite Treatment Holes in Concrete should always be handled with care and professionalism for lasting protection.
Termiticides Used in Concrete Treatment
Types of Termiticides
There are two main types of termiticides used under concrete:
- Repellent Termiticides
- These chemicals keep termites away from the treated area.
- Termites can sense them and avoid crossing through.
- Effective, but termites may find untreated gaps to enter.
- Example: Chlorpyrifos (20% EC) – a strong chemical that repels termites, commonly used in India.
- Non-Repellent Termiticides
- These chemicals cannot be detected by termites.
- Termites walk through it, get poisoned, and carry it back to the colony.
- This can kill thousands of termites, including the queen.
- Examples: Fipronil (0.05% to 0.1%) – attacks the termite’s nervous system; Imidacloprid (0.05%) – a slow-acting poison that spreads within the colony.
How Termiticides Work Under Concrete
- The chemical is injected through drilled holes in the concrete.
- It spreads sideways and down in the soil under the concrete.
- This forms a chemical barrier that termites cannot cross.
- If any termites are already inside the home, they are slowly killed.
- The barrier also prevents new termites from coming in.
- The soil holds the chemical for years, keeping the home protected.
How Long Do Termiticides Last?
| Chemical | Type | Average Lifespan |
|---|---|---|
| Chlorpyrifos | Repellent | 3–5 years |
| Fipronil | Non-repellent | 7–10 years |
| Imidacloprid | Non-repellent | 5–8 years |
Note: Lifespan can vary based on soil type, moisture, and how well the treatment is done.
Are Termiticides Safe?
Most modern termiticides are safe when applied by trained professionals and used in the correct amount.
- Do not touch or walk on treated areas for at least 6–12 hours.
- Ventilate the home well after treatment.
- Keep children and pets away from the area until it dries.
- Ask for Material Safety Data Sheets (MSDS) if you want more information.
- Professional pest control companies follow safety rules set by government guidelines (such as BIS or IS 6313 for termite control).
What to Ask Your Pest Control Company
- Which chemical will you use?
- Is it approved for indoor residential use?
- How long will the chemical last?
- Do I need to leave the house during treatment?
- Do you provide a warranty or guarantee?
These questions help ensure you receive quality service with safe and lasting results.
Quick Summary
| Termiticide | Repellent? | Kills Colony? | Used Under Concrete? | Lasts For |
|---|---|---|---|---|
| Chlorpyrifos | Yes | No | Yes | 3–5 years |
| Fipronil | No | Yes | Yes | 7–10 years |
| Imidacloprid | No | Yes | Yes | 5–8 years |
Using the right chemical in the right way makes a big difference in how well the termite treatment works and how long your home stays protected. Termite Treatment Holes in Concrete.
Costs Involved in Drilling and Treating Termites in Concrete
The cost of drilling and termite treatment under concrete depends on the area, chemical used, and type of floor. While the treatment may seem costly, it saves your home from serious damage and expensive repairs later. Termite Treatment Holes in Concrete are a crucial step for long-term protection.
How Much Does Termite Treatment Cost Through Concrete Floors?
Termite treatment is an investment that protects your home from expensive damage. If termites are inside or under your concrete floors, treating them early can save you from major repairs later. But many people wonder, how much will it cost? Here’s a breakdown of the costs and the factors that affect the final price.
How Is the Cost Calculated?
Pest control companies usually calculate the price based on the square feet or total area to be treated.
- Cost Range in India (2025 estimate): ₹6 to ₹12 per square foot
- This may increase if you choose premium chemicals, such as Fipronil
- For a 1000 sq. ft. flat, termite treatment under concrete may cost anywhere from ₹6,000 to ₹12,000 or more
Factors That Affect the Cost
- Size of the Area
- Larger homes or office spaces mean more drilling, more chemical, and more labor
- Example: 500 sq. ft. may cost ₹3,000 to ₹6,000; 1500 sq. ft. may cost ₹9,000 to ₹18,000
- Chemical Used
- Fipronil-based or non-repellent chemicals are more expensive but often more effective
- Chlorpyrifos is cheaper but may not last as long or kill hidden colonies
- Type of Construction
- Tiled floors need careful drilling to avoid damage
- Marble or granite surfaces may require expert handling, increasing labor charges
- Thick floors or those with steel bars need extra work and stronger drills
- Extent of Infestation
- If termites have spread to walls, furniture, or woodwork, treatment may need to be extended to those areas
- This means extra drilling, spraying, or wood treatment, which adds to the cost
- Location of the Property
- Big cities like Delhi, Mumbai, or Bangalore often have higher prices
- Smaller towns may be more affordable
- Warranty or AMC (Annual Maintenance Contract)
- Some pest control companies offer a 1 to 5-year warranty with treatment
- Extended coverage or annual check-ups can increase the price but provide peace of mind
What’s Included in the Price?
| Included | Yes/No |
|---|---|
| Drilling of holes | Yes |
| Injection of termiticides | Yes |
| Sealing of holes | Yes |
| Safety precautions by trained workers | Yes |
| Post-treatment inspection | Usually |
| Follow-up treatment (if needed) | Maybe (check terms) |
| Warranty | Maybe (ask before booking) |
Hidden Charges to Watch Out For
- Furniture shifting (if the company charges extra to move beds, sofas, etc.)
- Marble drilling fees (more costly materials may be charged separately)
- GST or service tax
- Emergency or urgent service fees
Always ask for a detailed quotation before the job starts.
Tips to Save Money
- Get 2–3 quotes from different pest control companies
- Ask for combo discounts if treating the whole home (walls, furniture, floor)
- Opt for long-term warranty packages to avoid repeat charges later
Quick Example: Estimated Price Chart (for 2025 India)
| Flat Size | Basic Chemicals (₹6/sq. ft.) | Premium Chemicals (₹12/sq. ft.) |
|---|---|---|
| 500 sq. ft. | ₹3,000 | ₹6,000 |
| 1000 sq. ft. | ₹6,000 | ₹12,000 |
| 1500 sq. ft. | ₹9,000 | ₹18,000 |
Case Studies and Real-Life Examples
Understanding Real-Life Termite Treatment Under Concrete
Learning from real situations helps visualize how termite treatments are applied and how effective they can be. Below are examples of termite treatment holes in concrete for different property types.
Case Study 1: Residential Treatment in a Mumbai Apartment
Background
- A homeowner in Mumbai noticed small holes in the walls and found termite mud tubes near their concrete floor.
- Inspection revealed termites living under the concrete, invading wooden furniture and beams inside the house.
The Solution
- Pest control professionals drilled small holes into the concrete floor near suspected entry points.
- A non-repellent termite treatment was injected, spreading through the soil and killing termites upon contact.
- The treatment formed a barrier to prevent future infestations.
Outcome
- After treatment, dead termites were found and no new activity was observed after two weeks.
- Follow-up inspections confirmed complete eradication of termites.
- The house remained termite-free for four years.
Case Study 2: Commercial Building in Delhi
Background
- A commercial building with offices and a restaurant faced significant termite problems under the concrete basement floor.
- Wooden beams supporting the structure were being damaged by termites.
The Solution
- The building manager hired a pest control company specializing in industrial termite treatments.
- Holes were drilled in strategic areas of the concrete foundation, especially in the basement.
- A high-performance liquid termiticide was applied to create an effective chemical barrier.
Outcome
- No termites were found within a month of treatment.
- Regular follow-up checks and booster treatments were conducted as needed.
- The property remained termite-free for five years.
Case Study 3: Old House Treatment in Bangalore
Background
- An old house, about 50 years old, had termite infestations in both the walls and under the concrete floors.
- Previous DIY methods had failed to eliminate the termites.
The Solution
- A comprehensive treatment plan was recommended, involving drilling holes in the concrete and installing bait stations alongside liquid termiticides.
- Wooden areas and walls were also treated to prevent termites from moving from the concrete to other parts of the house.
Outcome
- After treatment, termite numbers decreased and no further damage was observed.
- The entire colony was eliminated, and annual maintenance was recommended.
- The house remained protected from termite damage.
Regulations and Guidelines
Local Regulations for Termite Treatment in India
- Use of Approved Chemicals
- All termite treatment chemicals must be approved by the Central Insecticides Board (CIB) under the Ministry of Agriculture and Farmers’ Welfare.
- Only chemicals approved for safety and efficiency can be used in pest control.
- Professional Certification
- Pest control companies must be certified by the Pest Control Association of India (PCAI) or similar organizations.
- Technicians must have proper training and certification to ensure correct methods and chemical use.
- Environmental Safety
- Treatments must comply with environmental guidelines to avoid harming plants, wildlife, or water sources.
- Non-repellent chemicals are commonly used as they are less toxic and safer for the environment when applied correctly.
Guidelines for Homeowners
- Avoid DIY Treatments
- Always hire a licensed pest control professional.
- DIY treatments can be ineffective and may cause safety hazards or property damage.
- Follow Safety Instructions
- After treatment, follow all safety instructions provided by the pest control company.
- Ensure children and pets are kept away from treated areas until it is safe.
- Pre-Treatment Preparations
- Clear furniture or items from areas to be treated if required.
- Coordinate with your pest control company to prepare your home properly.
Specific Guidelines for Termite Treatment Under Concrete
- Inspection Before Treatment
- A thorough inspection should be done before treatment begins.
- Pest control professionals will check for termite activity in hidden areas, including beneath concrete floors and around foundations.
- Hole Drilling and Sealing
- Small holes are drilled into the concrete floor to inject chemical treatments.
- After treatment, holes must be sealed to prevent water seepage and maintain the structural integrity of the concrete.
- Documentation and Reporting
- Pest control companies should provide written documentation about chemicals used, treated areas, and recommendations for follow-up.
Guidelines for Property Owners After Treatment
- Regular Inspections
- Schedule follow-up inspections every 6 to 12 months to ensure continued effectiveness and detect new termite activity.
- Keeping the Area Dry
- Maintain dry conditions around the concrete foundation to preserve the chemical barrier and deter termites.
- Repairing Cracks and Gaps
- Repair any new cracks or gaps in the concrete promptly to reduce the risk of termite re-entry.
International Standards for Termite Control
- ISO Standards
- The International Organization for Standardization (ISO) sets quality and safety standards for pest control companies.
- Companies are encouraged to follow these standards for consistent and high-quality service.
- Safe Chemical Handling
- International standards emphasize safe handling, storage, disposal, and protective measures for workers using termite treatment chemicals.
Termite Treatment Holes in Concrete should always follow proper regulations and guidelines to ensure safety, effectiveness, and durability.
Working with licensed professionals who adhere to both local and international standards will help protect your home, the environment, and your health.
Common Myths and Facts
Understanding the Myths About Termite Treatment Under Concrete
Termite Treatment Holes in Concrete are often misunderstood. Many homeowners are uncertain about how termite treatment works under concrete, leading to widespread myths and confusion. Here, we address the most common misconceptions and clarify the facts in simple terms.
Myth 1: Termites Can't Live Under Concrete
Termites can and often do live under concrete. Concrete may seem solid, but small cracks and gaps allow termites to enter. Once inside, they create mud tubes or find hidden spaces to feed and reproduce. Termites need wood and moisture, both of which can be present under or around untreated concrete.
Myth 2: One Treatment Lasts Forever
Termite treatment is not a permanent, one-time solution. Treatments may last several years depending on the chemical used, but termites can return if the protective barrier is not maintained. Regular inspections and possible re-treatments are necessary to ensure ongoing protection.
Myth 3: No Visible Termites Means No Problem
Not seeing termites does not mean your home is safe. Termites often remain hidden under floors or inside walls, causing damage before you notice any signs. Preventive treatments are effective even if you do not see termites, helping you avoid future infestations.
Myth 4: Only Wooden Houses Need Termite Treatment
Concrete, brick, or steel homes are not immune to termites. Termites can attack wooden beams, flooring, and furniture inside any house. All homes, regardless of construction type, benefit from proper termite treatment to prevent damage.
Myth 5: DIY Termite Treatment Is Sufficient
Treating termites is not a do-it-yourself task. It requires specialized equipment, knowledge, and safe application of chemicals. Attempting it yourself may leave areas untreated, involve unsafe chemicals, or damage your property. Always hire a licensed pest control professional for effective and safe treatment.
Myth 6: Termite Treatment Will Ruin My Floor
Professional termite treatment involves drilling small, discreet holes in the floor, which are sealed neatly with cement or grout after treatment. When done properly, the appearance of your floor is preserved and the holes are barely noticeable.
Myth 7: Termite Treatment Is Harmful to Health or Pets
Modern termite treatments are safe when applied by trained professionals. They use regulated chemicals and follow strict safety guidelines. You may be advised to avoid treated areas for a few hours, but once dry, the area is safe for people and pets.
Myth 8: Termite Treatments Are Too Expensive
While termite treatments may seem costly, they are a wise investment compared to the high cost of repairing termite damage. Treatment protects your home's structure, foundation, and furniture, saving you significant expenses in the future.
Myth 9: Only New Homes Need Termite Treatment
Both new and old homes are at risk of termite problems. Older homes may have hidden infestations, while new homes can also be vulnerable, especially in termite-prone areas. Early treatment is key to preventing major issues.
Myth 10: Treating Concrete Alone Is Enough
Treating only the concrete is not sufficient if termites are already present in walls or wood. Effective termite treatment should cover all entry points, including wooden beams, walls, and furniture. A thorough inspection ensures complete protection.
Quick Recap of the Myths and Facts
| Myth | The Truth |
|---|---|
| Termites can't live under concrete | Termites can and often do live under concrete floors |
| Once treated, you're done forever | Regular inspections and re-treatment are needed over time |
| No termites? No need to treat | Termites can be hidden, even if you don’t see them |
| Termite treatment is only for wooden homes | Concrete, brick, and steel homes also need termite treatment |
| DIY termite treatment works just fine | Professional treatment is necessary for safety and effectiveness |
| Termite treatment will ruin your floor | Holes are minimal and sealed neatly, leaving no damage |
| Termite treatment harms health or pets | Treatments are safe when done by trained professionals |
| Termite treatments are too expensive | Treatments prevent costly damage in the long run |
| Termite treatment is only for new homes | Both old and new homes can have termite issues |
| Treating concrete is enough | Walls, furniture, and other wood areas may also need treatment |
Do not let myths keep you from protecting your home. Knowing the facts about termite treatment holes in concrete helps you keep your property safe and secure.
Always rely on professional services and stay informed about the best ways to keep your home termite-free.
Frequently Asked Questions - FAQ's
Q. What do small, sealed holes in my wooden furniture indicate about termite activity and treatment?
A. Small, sealed holes in wooden furniture often signal active or past termite infestation. These holes are created as termites exit after feeding inside the wood. Prompt inspection and professional termite treatment are crucial to prevent further structural damage.
Q. How can I differentiate between termite exit holes and holes caused by other wood-boring insects before treatment?
A. Termite exit holes are typically round, tiny, and may be covered with a brown, plaster-like substance. In contrast, other insects like beetles or carpenter bees leave larger, uncovered holes, sometimes with visible frass or sawdust nearby.
Q. If I find mud tubes leading to small holes in my foundation, what type of termite treatment is most effective?
A. The presence of mud tubes suggests subterranean termites. The most effective treatment involves professional application of liquid termiticides or bait stations, targeting the colony directly for thorough elimination and long-term protection.
Q. Are the tiny holes I see in my drywall connected to a larger termite problem requiring professional treatment?
A. Tiny holes in drywall, known as termite pinholes, often indicate a more extensive hidden infestation. Professional inspection and treatment are recommended to fully address the underlying termite activity and prevent further damage.
Q. What is the significance of finding frass near small holes in wood, and how does it affect termite treatment options?
A. Finding frass (termite droppings) near small holes indicates active drywood termite infestation. This evidence helps professionals decide on targeted treatments like localized injections or fumigation, ensuring effective elimination of the pests.
Q. Should I attempt to seal visible termite holes myself, or is it better to leave them open for professional treatment?
A. Avoid sealing termite holes yourself before professional treatment. Open holes help pest control experts assess activity and apply chemicals directly, ensuring a more thorough and effective termite eradication process.
Q. Why do pest control companies often drill new holes as part of their termite treatment process, even if I see existing holes?
A. Pest control professionals drill new holes to ensure termite treatment chemicals reach all infested areas. Existing holes may not be in optimal locations for effective coverage, so new holes guarantee thorough and targeted application.
Q. What kind of filler is best to use for sealing termite treatment holes after the chemicals have been injected?
A. After termite treatment, use a wood filler or epoxy putty to seal holes. These materials restore the appearance and integrity of the wood, while also preventing future pest entry and moisture intrusion.
Q. Can the location and size of termite holes help determine the extent of the infestation and the necessary treatment?
A. The location and size of termite holes can indicate the severity and spread of the infestation. Multiple or widespread holes often require comprehensive treatment, while isolated holes may allow for localized solutions.
Q. How does the presence of termite holes in different areas of my house (e.g., walls, floors, attic) influence the treatment strategy?
A. Termite holes in various areas suggest a widespread infestation. Treatment strategies may include whole-house fumigation, targeted injections, or soil treatments, depending on the extent and location of the damage.
Q. If I only see a few small holes, does it mean I have a minor termite problem that I can treat myself, or could it be more extensive?
A. Even a few small termite holes can signal a larger hidden infestation. DIY treatments may not reach all affected areas, so professional inspection is recommended to ensure complete eradication and prevent future damage.
Q. What are the risks of ignoring termite holes and not seeking professional treatment immediately?
A. Ignoring termite holes allows the infestation to worsen, leading to severe structural damage, costly repairs, and potential safety hazards. Early professional intervention is crucial to protect your property and investment.
Q. Do different species of termites create different types of holes, and does this affect the choice of treatment?
A. Different termite species create distinct holes. Drywood termites make small exit holes, while subterranean termites build mud tubes. Identifying the species helps professionals choose the most effective, targeted treatment method.
Q. After termite treatment, how long should I monitor the old termite holes for any signs of renewed activity?
A. Monitor old termite holes for several months after treatment. Look for new frass, fresh mud, or additional holes. Continued vigilance helps catch any signs of renewed termite activity early.
Q. If I'm considering buying a house and see filled holes in the wood, what questions should I ask about past termite treatment?
A. Ask about the type of termite treatment performed, warranty status, inspection reports, and whether the infestation was fully eliminated. Request documentation to ensure the property is protected against future termite issues.
Q. Can termite bait stations be effective if there are no visible termite holes inside my home?
A. Termite bait stations can still be effective without visible holes. They target hidden colonies by attracting foraging termites, providing long-term protection even when internal activity is not immediately apparent.
Q. What is the "drill-fill-seal" method for termite treatment, and why is it commonly used for treating termite holes?
A. The drill-fill-seal method involves drilling holes, injecting termiticide, and sealing them. This approach ensures chemicals reach hidden galleries, providing thorough coverage and preventing termites from escaping or returning.
Q. How deep and at what angle do professionals typically drill holes for injecting termiticides near suspected termite activity?
A. Professionals usually drill holes at a slight downward angle, reaching the depth of the infested wood or foundation. This allows termiticide to penetrate galleries and soil, maximizing effectiveness against hidden termites.
Q. Are there any non-drilling methods for termite treatment that can be used even when termite holes are visible?
A. Yes, non-drilling methods like surface sprays, foam injections, and bait stations can be used. These options are less invasive and suitable for certain infestations, but professional assessment ensures the best approach.
Q. If I find termite holes in a specific wooden item, like a bookshelf, can I just treat that item, or should I worry about the entire house?
A. Treating only the affected wooden item may not address a larger infestation. Termites often spread beyond visible damage, so inspecting the entire house is important to ensure complete and lasting protection.
Conclusion: Key Takeaways from the Guide
Understanding Termites: The Hidden Threat
- Termites are small yet destructive pests that can cause major property damage.
- They feed on wood and organic materials, often working undetected inside concrete walls or floors.
- Concrete does not block termites; even tiny gaps or cracks allow them to enter and infest.
Why Concrete is a Target for Termites
- Concrete floors are vulnerable due to moisture, cracks, or small openings that provide access for termites.
- Once inside, termites can damage wooden structures beneath or within the home if left untreated.
How Termite Treatment Under Concrete Works
- Professionals drill small holes in the concrete to inject chemicals that kill or repel termites.
- The chemicals form a protective barrier to prevent future termite entry.
- This process is effective when performed by experienced pest control experts.
What You Should Expect After Treatment
- Immediately after treatment, avoid treated areas for a few hours to let chemicals dry.
- Short-term, you may notice dead termites or some trying to escape.
- Long-term, a successful treatment eliminates termites and the barrier can last several years, depending on the chemicals used.
Cost of Termite Treatment Under Concrete
- Costs depend on home size, chemicals, and infestation level.
- Average treatment ranges from ₹6 to ₹12 per square foot, but prices vary by location and provider.
- Treatment costs are generally much less than repairing termite damage.
Post-Treatment Care and Prevention
- Avoid disturbing treated areas for a short period, ensure good ventilation, and seal cracks to prevent new infestations.
- Schedule regular inspections every 6 to 12 months to maintain protection.
- Keep the area dry and store wood away from concrete to reduce termite attraction.
Common Myths About Termite Treatment
- Termites can survive under concrete; concrete alone does not guarantee protection.
- Treatment is not permanent; termites may return if the barrier breaks down or new colonies invade.
- Professional treatment is essential; DIY approaches often fail to solve the problem.
- Treating only the concrete is not enough; inspect and protect all areas of your home, including wood and walls.
Key Takeaways
- Do not ignore termite risks, even if you do not see visible signs; early intervention saves money and prevents damage.
- Always hire licensed professionals for safe and effective termite treatment.
- Prevention is crucial; regular inspections and sealing cracks help keep termites away long-term.
Stay proactive with termite protection. Understanding the process, knowing what to expect, and keeping up with inspections will help prevent future termite damage and keep your home safe and sound. Termite Treatment Holes in Concrete is a proven method for long-term protection.
Also Read: What Attracts Bed Bugs to My Home?
- termite treatment drill holes
- termite treatment holes in concrete
- drill holes for termite treatment
- termite treatment holes
- termite barrier drill holes
- termite control drilling holes
- pest control drilling holes
- termite treatment drilling holes in concrete
- subterranean termite treatment drilling
- drill and inject termite treatment
- filling termite treatment holes
- drilling holes in concrete for termite treatment
- drill holes in concrete for termites
- drilling holes for termites
- drilling holes in brick to treat termites
- drilling holes in concrete for termites
- drilling holes in foundation for termite treatment
- drilling holes in walls for termites
- drilling holes to treat termites
- drilling slab for termite control
- holes drilled in concrete for termites
- termite drill holes